Getting Started
This tutorial will focus on exploring how to use DRF Blog Bridger within a Django REST Framework project. You will learn how to build a functional blog API with proper permission levels.
Note
This tutorial assumes you have used Django REST Framework before. If you have not, consult the official documentation to get started.
Step 1: Install and Set up drf-blog-bridger
Start by installing DRF Blog Bridger into your project's virtual environment:
After installation, add the following configurations to your settings file:
    INSTALLED_APPS = [

        'blog_bridger_drf',
        'rest_framework',
    ]

    REST_FRAMEWORK = {
        'DEFAULT_PERMISSION_CLASSES':[
            'rest_framework.permissions.IsAuthenticatedOrReadOnly',
        ]
    }
urls.py file:
Finally, run migrations to complete the installation:
Step 2: Create Your User Model and Serializer
DRF Blog Bridger has authentication restrictions which means you need to be logged in to perform certain operations such as creating posts. You should start by creating a new app for users. Run this command in your CLI:
After running the command above, add the following to yourINSTALLED_APPS settings:
For the purpose of this tutorial, you can stick to the default user model in Django. However, Django REST Framework allows you to define a custom user model if you need one.
After setting up your user model, create a new file called seriaizers.py within your users app. In your serializer file, you can create a serializer for your user like this:
from rest_framework import serializers
from django.contrib.auth import get_user_model

User = get_user_model()

class UserSerializer(serializers.ModelSerializer):
    password = serializers.CharField(min_length=8, write_only=True)

    class Meta:
        model = User
        # add more fields if required
        fields=['id', 'first_name', 'last_name', 'username', 'email', 'password']

    def create(self, validated_data):
        user = User.objects.create_user(**validated_data)
        return user
If you want the above serializer to return the posts related to the user, you can use the PostSerializer in drf-blog-bridger to create a post field. Here's an example:
from blog_bridger_drf.serializers import PostSerializer # new import

class UserSerializer(serializers.ModelSerializer):
    password = serializers.CharField(min_length=8, write_only=True)
    posts = PostSerializer(read_only=True, many=True) # create post field

    class Meta:
        ...
        fields = ['posts'] # populate this field as required
Step 3: Create Authentication Views for Your User Model
Because drf-blog-bridger won't let users perform certain operations unless they authenticate themselves, you need to provide a way for your users to create accounts and log in to their accounts.
An easy way to achieve this is to use Simple JWT to authenticate users. Start by installing it with this CLI command:
After installing the Simple JWT package, add the following code to your settings file:
INSTALLED_APPS = [
    'rest_framework_simplejwt',
]
REST_FRAMEWORK = {
    'DEFAULT_AUTHENTICATION_CLASSES': (
        'rest_framework_simplejwt.authentication.JWTAuthentication',
    )
}
Once you are done with the configuration above, open your users/views.py file to create a signup view. Here's an example of such view:
from rest_framework import generics, status
from rest_framework.response import Response
from rest_framework.request import Request

from .serializers import UserSerializer

class Signup(generics.GenericAPIView):
    serializer_class = UserSerializer
    permission_classes = ()

    def post(self, request:Request):
        serializer = self.serializer_class(data=request.data)
        if serializer.is_valid():
            serializer.save()
            response = {
                "message":"successful",
                "data": serializer.data
            }
            return Response(data=response, status=status.HTTP_201_CREATED)
        response = {
            "message":"failed",
            "info": serializer.errors
        }
        return Response(data=response, status=status.HTTP_400_BAD_REQUEST)
Note
Since we are using REST Framework Simple JWT, there is no need to manually create a login view. However, if you have peculiar needs, feel free to create your custom login view.
The above view will let you send a POST request to create an account for users using the fields you specified in your serializer. Feel free to add more features such as email authentication to your view.
Step 4: Create URL Patterns for Your Views
URL patterns will enable your users to access and interact with your API. These steps will show you how to create URL patterns for your login and signup views.
-
Add a URL pattern to your project-level
urls.pyfile: -
Create a new file within your user app. Call this app
urls.py - Inside your new
urls.pyfile, paste this code into it:users/urls.pyfrom django.urls import path from rest_framework_simplejwt.views import TokenObtainPairView, TokenRefreshView from .views import Signup urlpatterns = [ path('signup/', Signup.as_view(), name="signup"), path('login/', TokenObtainPairView.as_view(), name="login"), path('login/refresh/', TokenRefreshView.as_view(), name='token_refresh'), ]
The code snippet above uses the views available in rest_framework_simplejwt to create a login/ URL pattern and a login/refresh/ URL pattern.
This means that whenever a user logs in to their account, they get a pair of tokens(access, and refresh tokens) to authenticate them. You can use the refresh token to create new access tokens.
For more information, read the official documentation of Django REST Framework Simple JWT.
Step 5: Create a User and Test the drf-blog-bridger Endpoints
You can use a tool like Postman to access your endpoints.
-
Firstly, you have to create a user and log in with that user. Here's a sample POST request data to create a new user:
You should send your request to{ "first_name":"john", "last_name":"doe", "username":"johnny", "email":"johndoe@email.com", "password":"testing123" }localhost:8000/api/users/signup.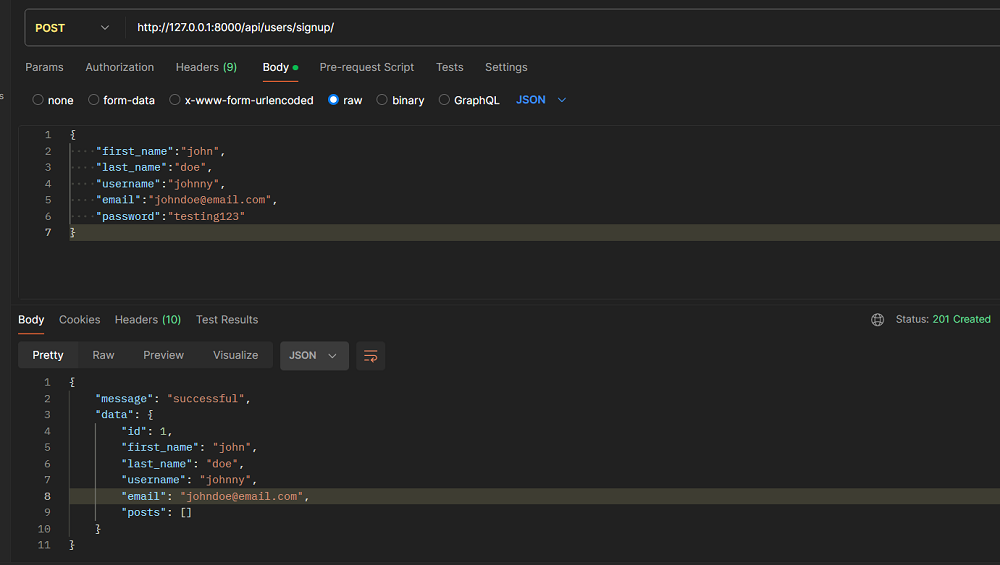
Creating a user with the signup endpoint -
Next, use the username and password to log in. The login fields might be different if you're using a custom user model. You can use this data to send a POST request to the login endpoint:

Accesing the login endpoint -
Copy your access token and add it to the authorization header of your request. Since the API uses JWT, you should add your token as a bearer token. Postman provides information on how to add bearer tokens.
In the image below, the access token is included in the Create Post request available in
drf-blog-bridger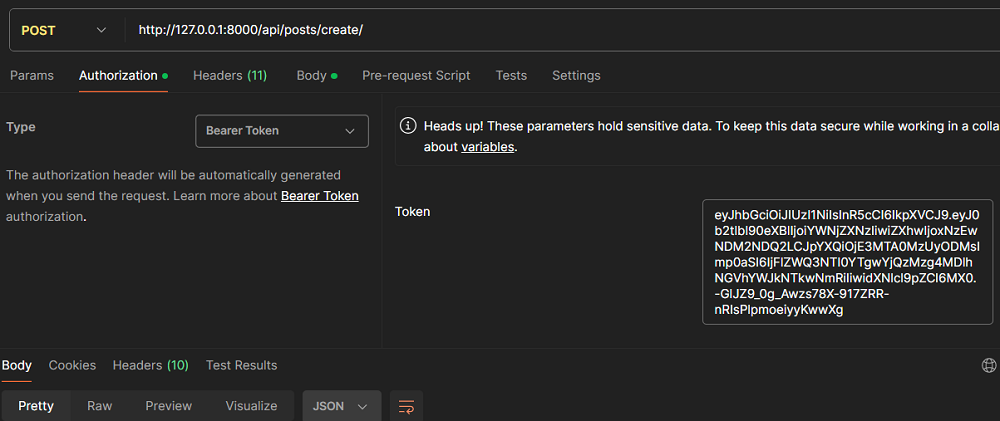
Accesing the login endpoint -
Now that you have an authenticated user, you will be able to access the
create/endpoint indrf-blog-bridger. You can use this sample data to create your first post:
Creating a new post Conclusion
In this tutorial, you have learned how to integrate the
drf-blog-bridgerpackage into a real-world project. You should continue integrating it into your project by accessing other endpoints defined in the API reference.